Short Guide on How to Collect Your $SQR Rewards
The first part will guide you through adding the SQR Contract Address to your MetaMask.
The second part of the tutorial will explain how to claim your $SQR Rewards!
1. How to Add the SQR Contract Address to Your MetaMask?
Step 1: Log into Your MetaMask Wallet
Log into your MetaMask account.
Step 2: Import the SQR Token
Click on the “Import Tokens” button.

The official contract address of the $SQR token: click here
Copy the official Contract Address.
You only need this part:
0x2B72867c32CF673F7b02d208B26889fEd353B1f8
Paste it into the “Token Contract Address” field.
Click “Next” and then “Import”.
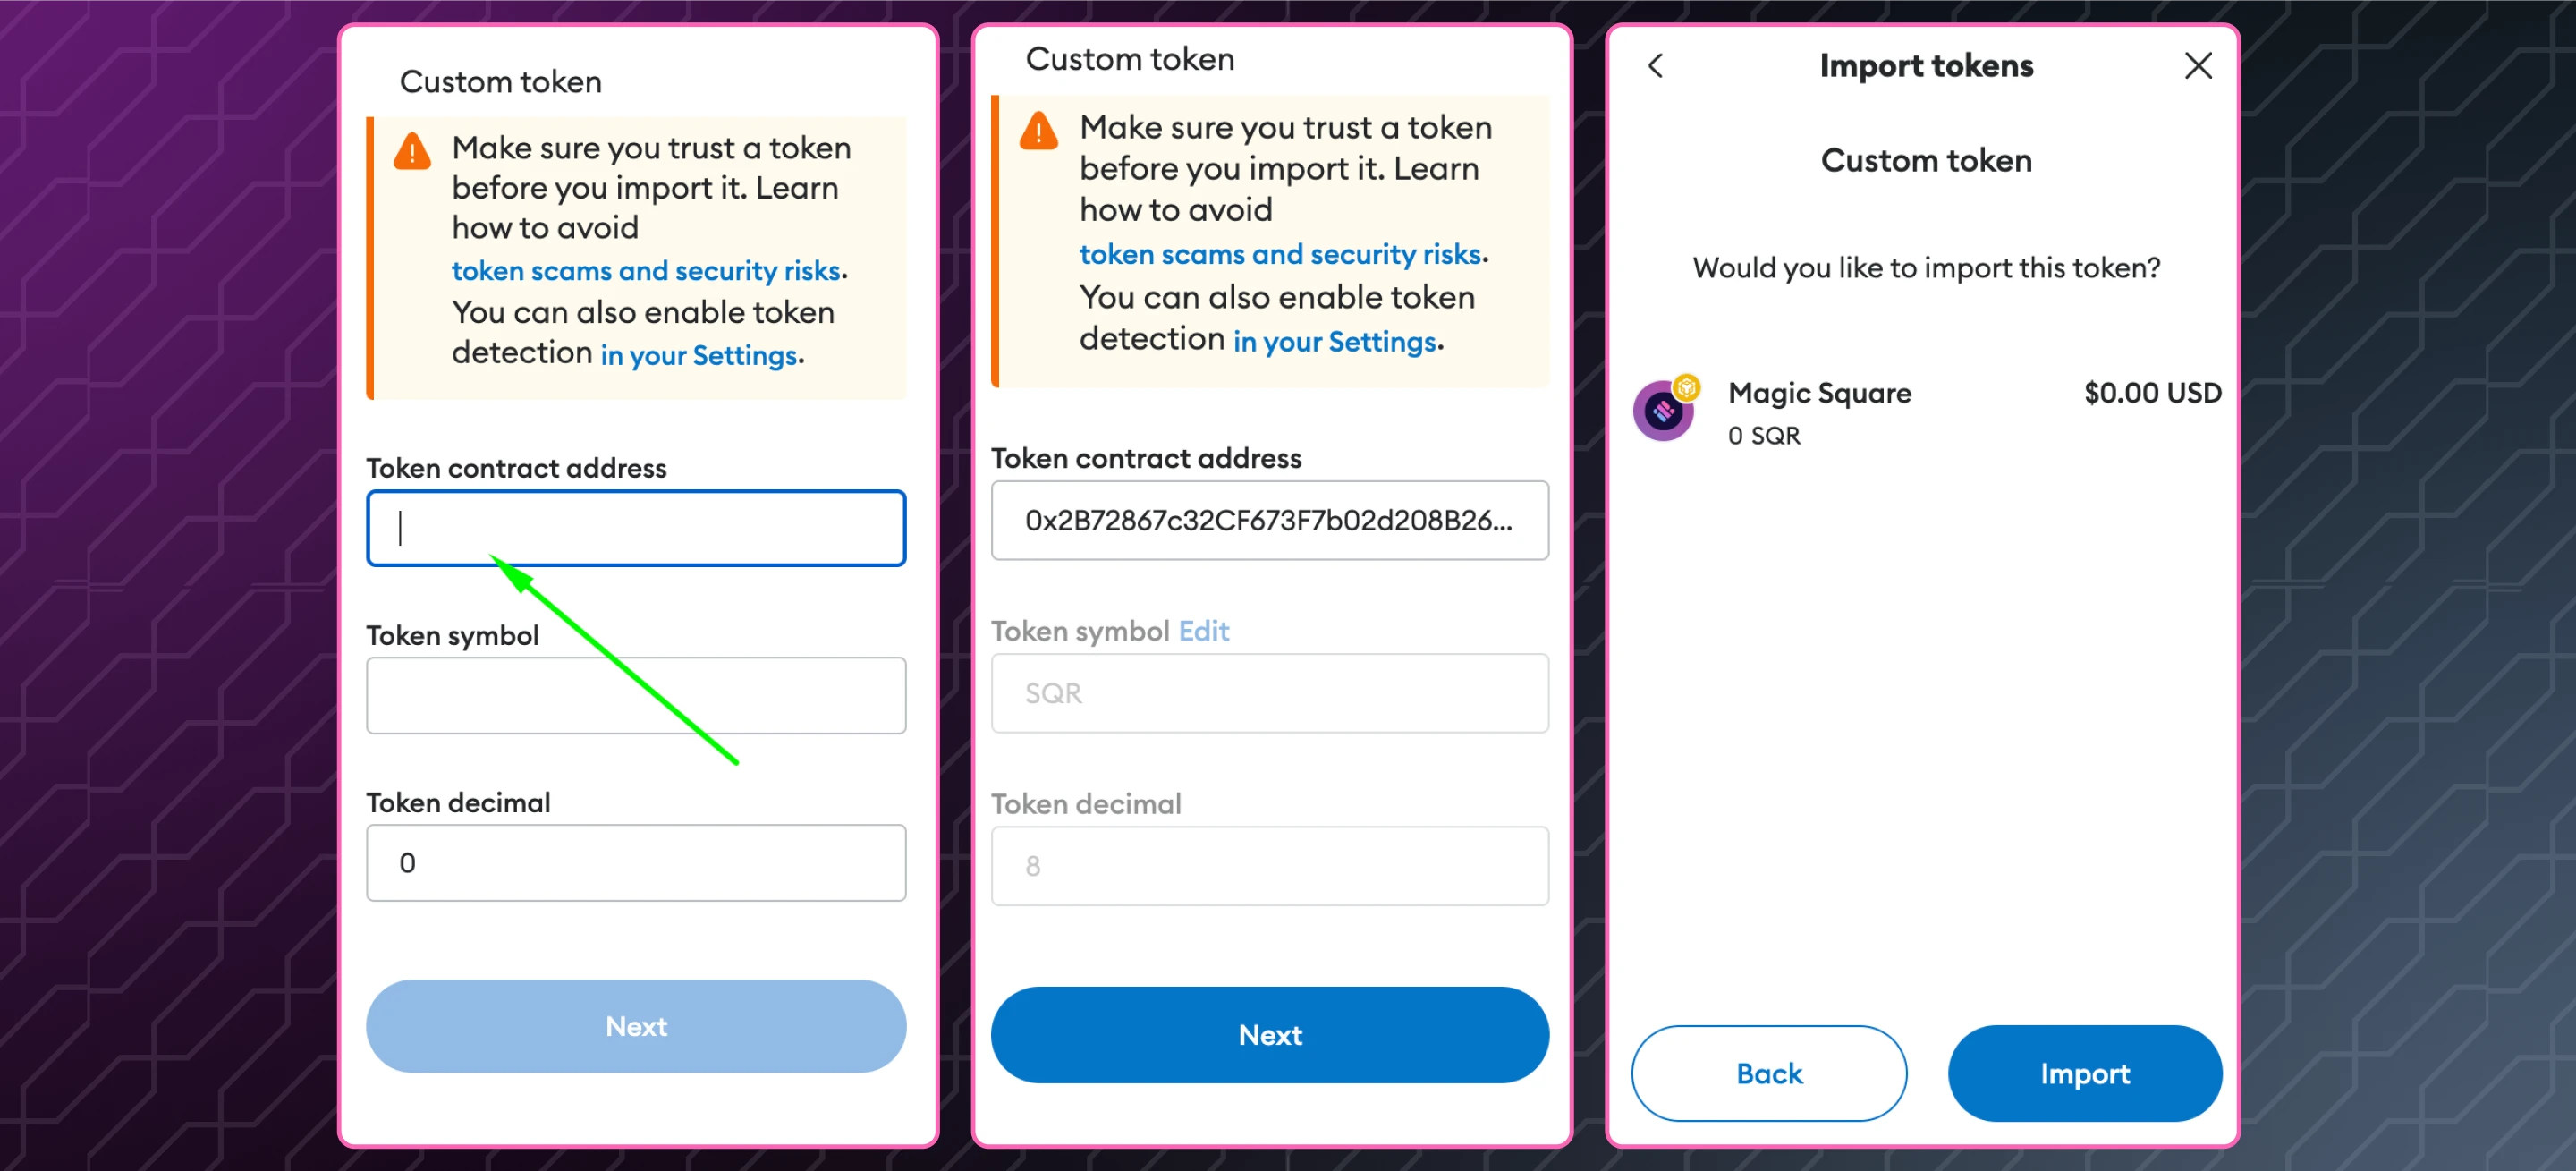
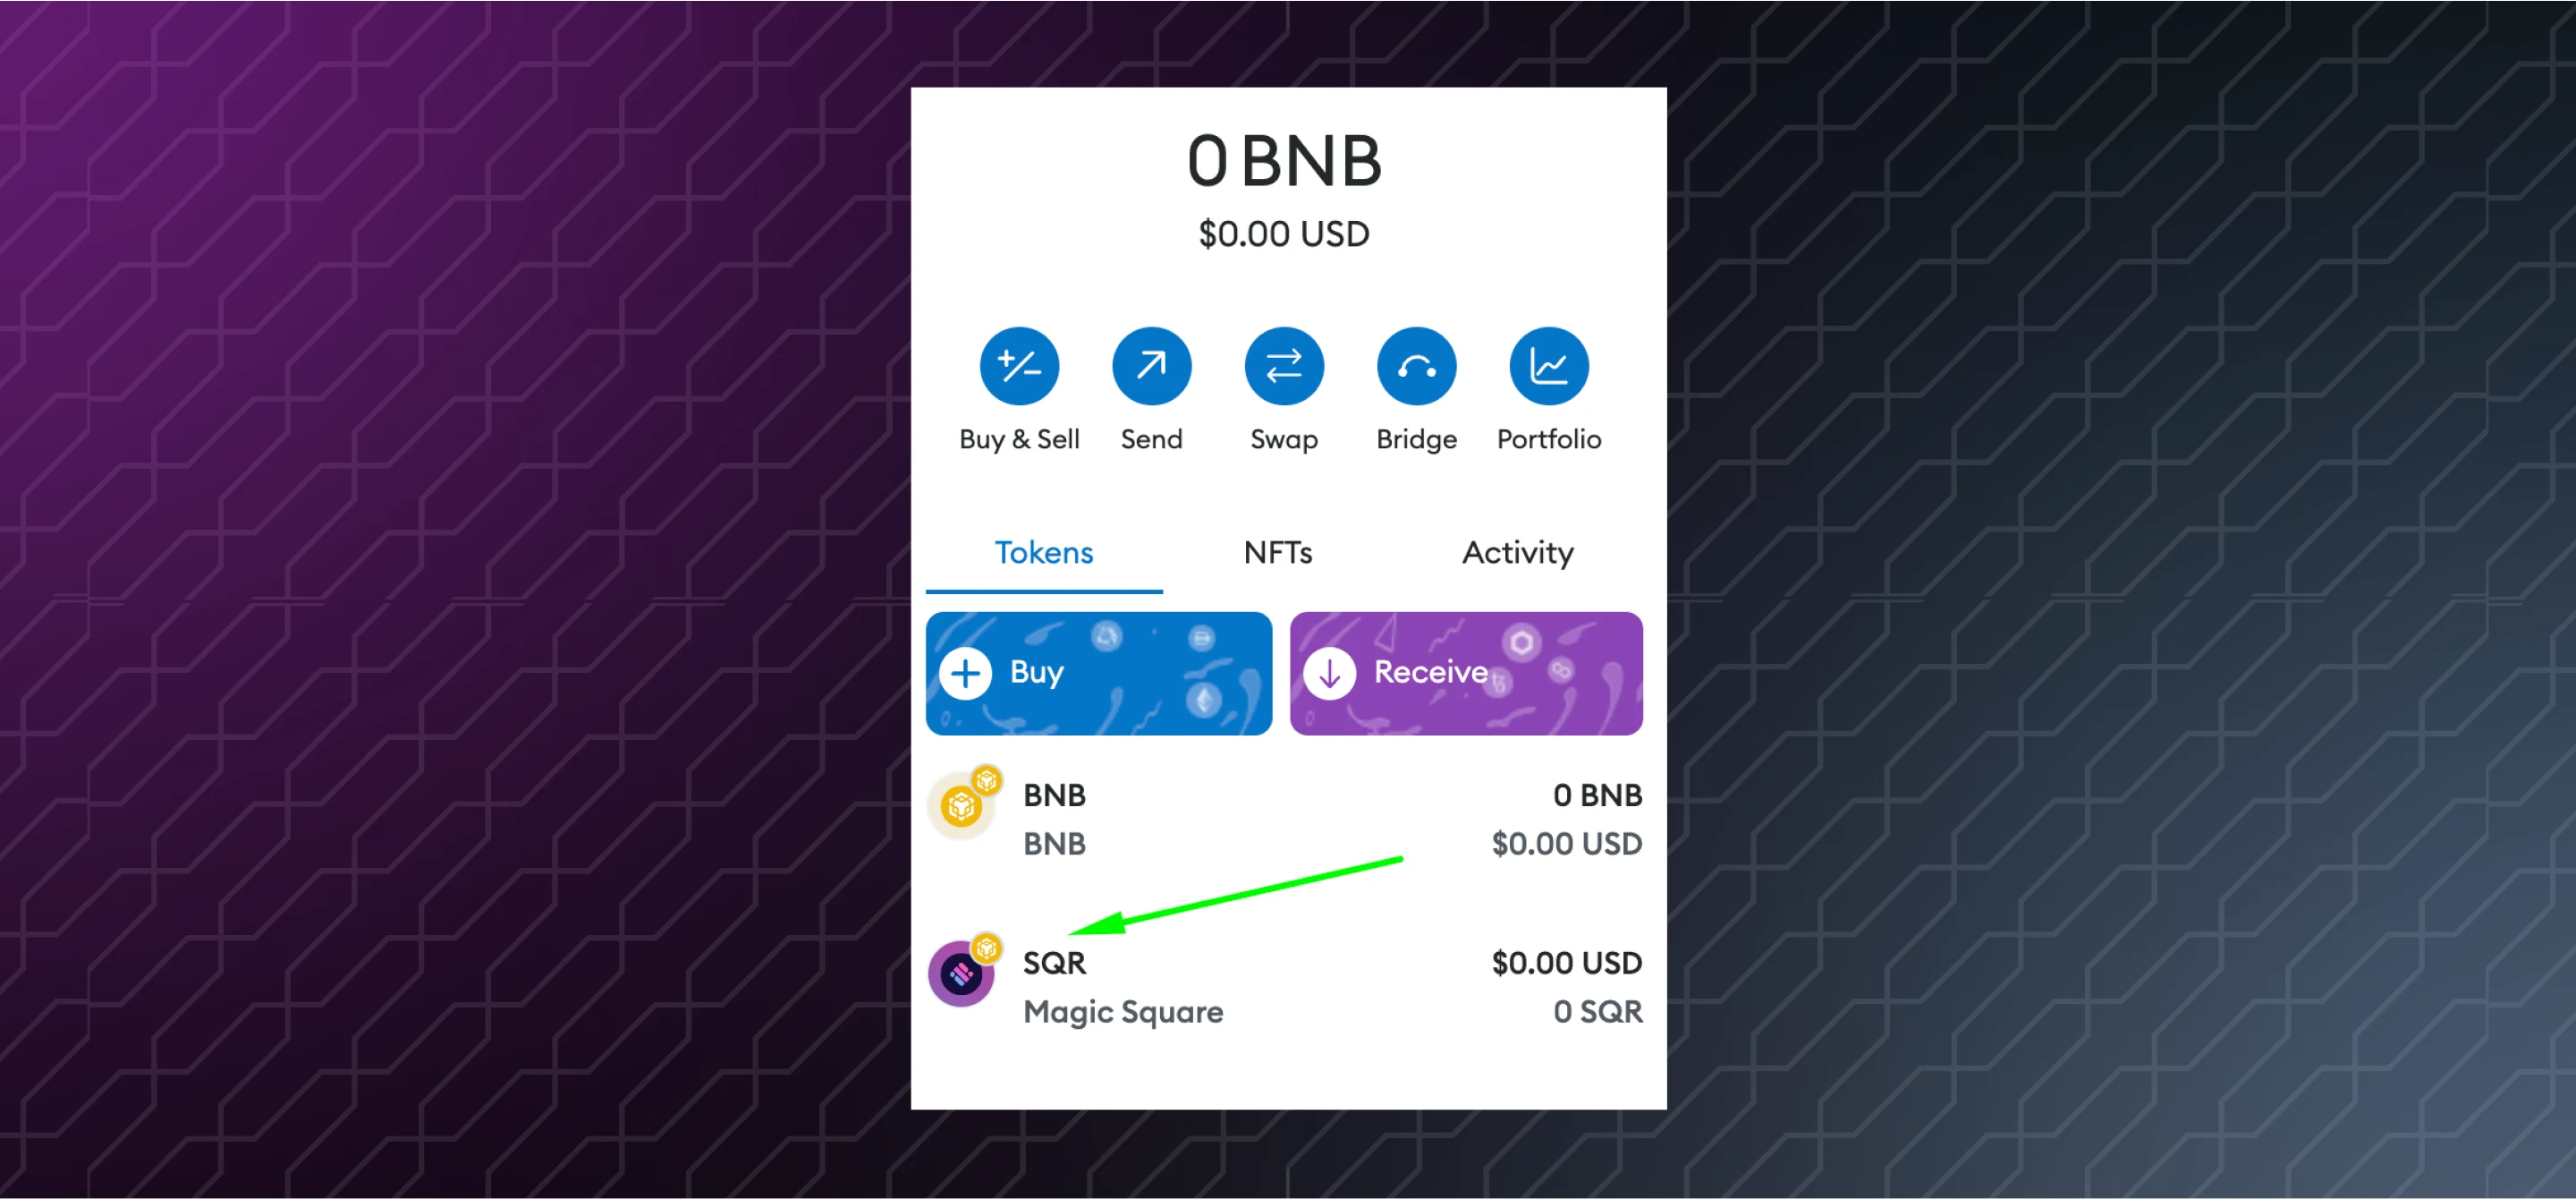
After this you will be able to see SQR token in your wallet.
2. How to claim Your SQR Rewards?
Step 1: Go to Your Profile Settings
Important Note: Ensure you have a verified email address and a Gitcoin passport with 18+ points, or complete the Amazon Liveness Test. To learn how to get your Gitcoin passport and earn 18+ points, please visit the provided link. For instructions on passing the Amazon Liveness Test, please visit the provided link.
Important Note: To claim your $SQR tokens, you are required to create a username, verify your email, connect your EVM Wallet, and either complete the Amazon Liveness Test or obtain a Gitcoin Passport.
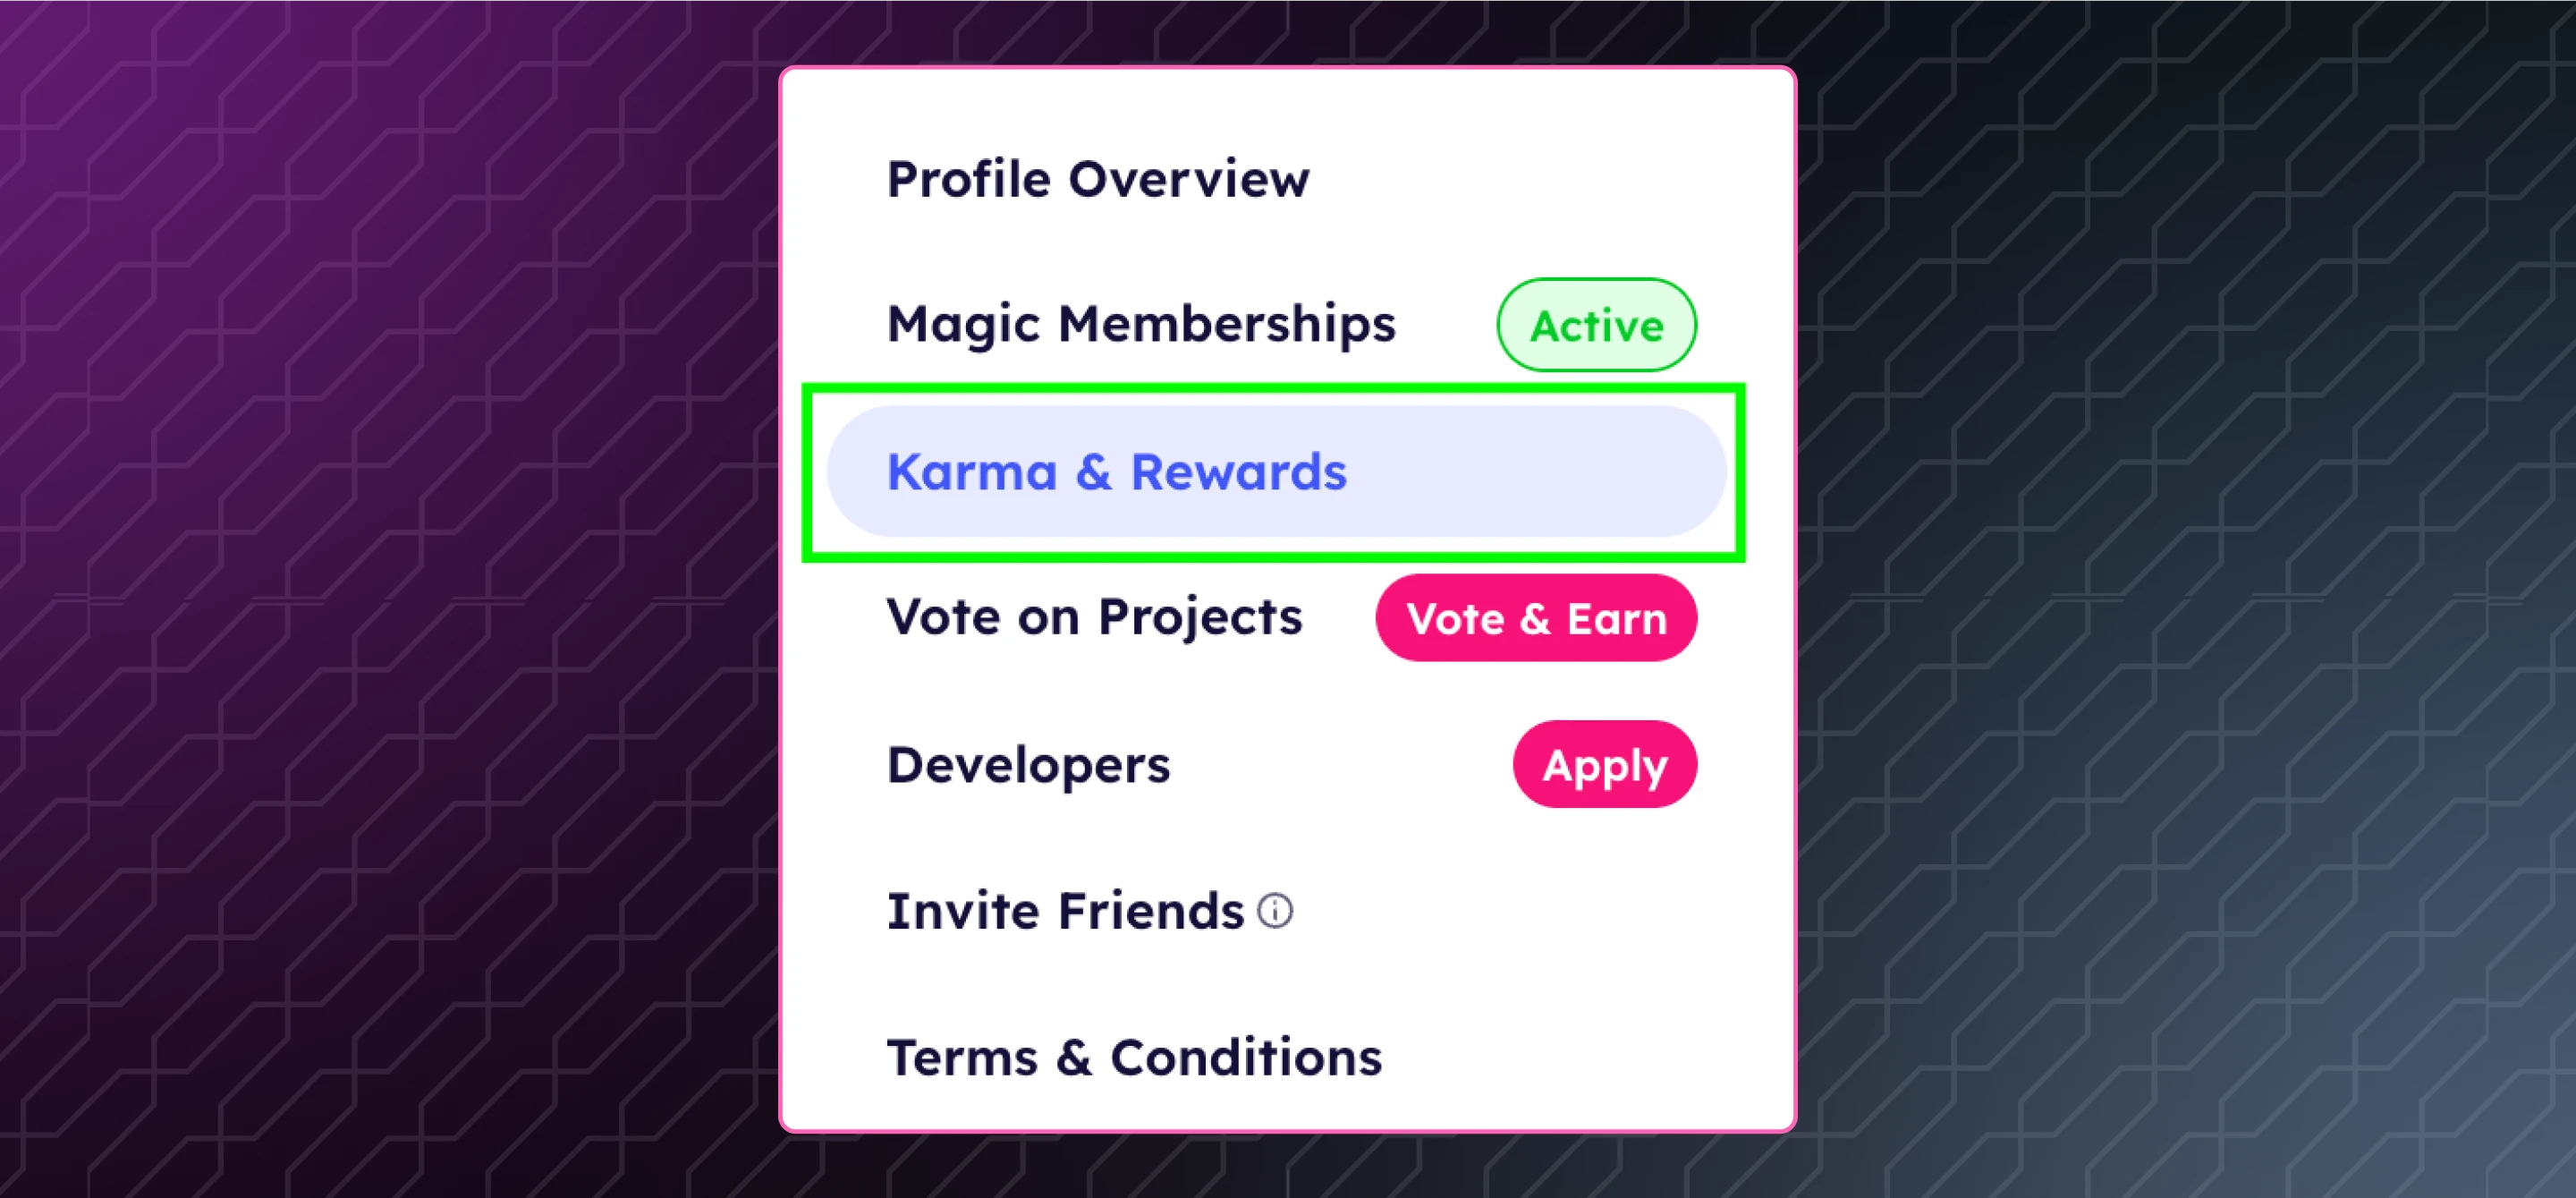
Navigate to your profile settings.

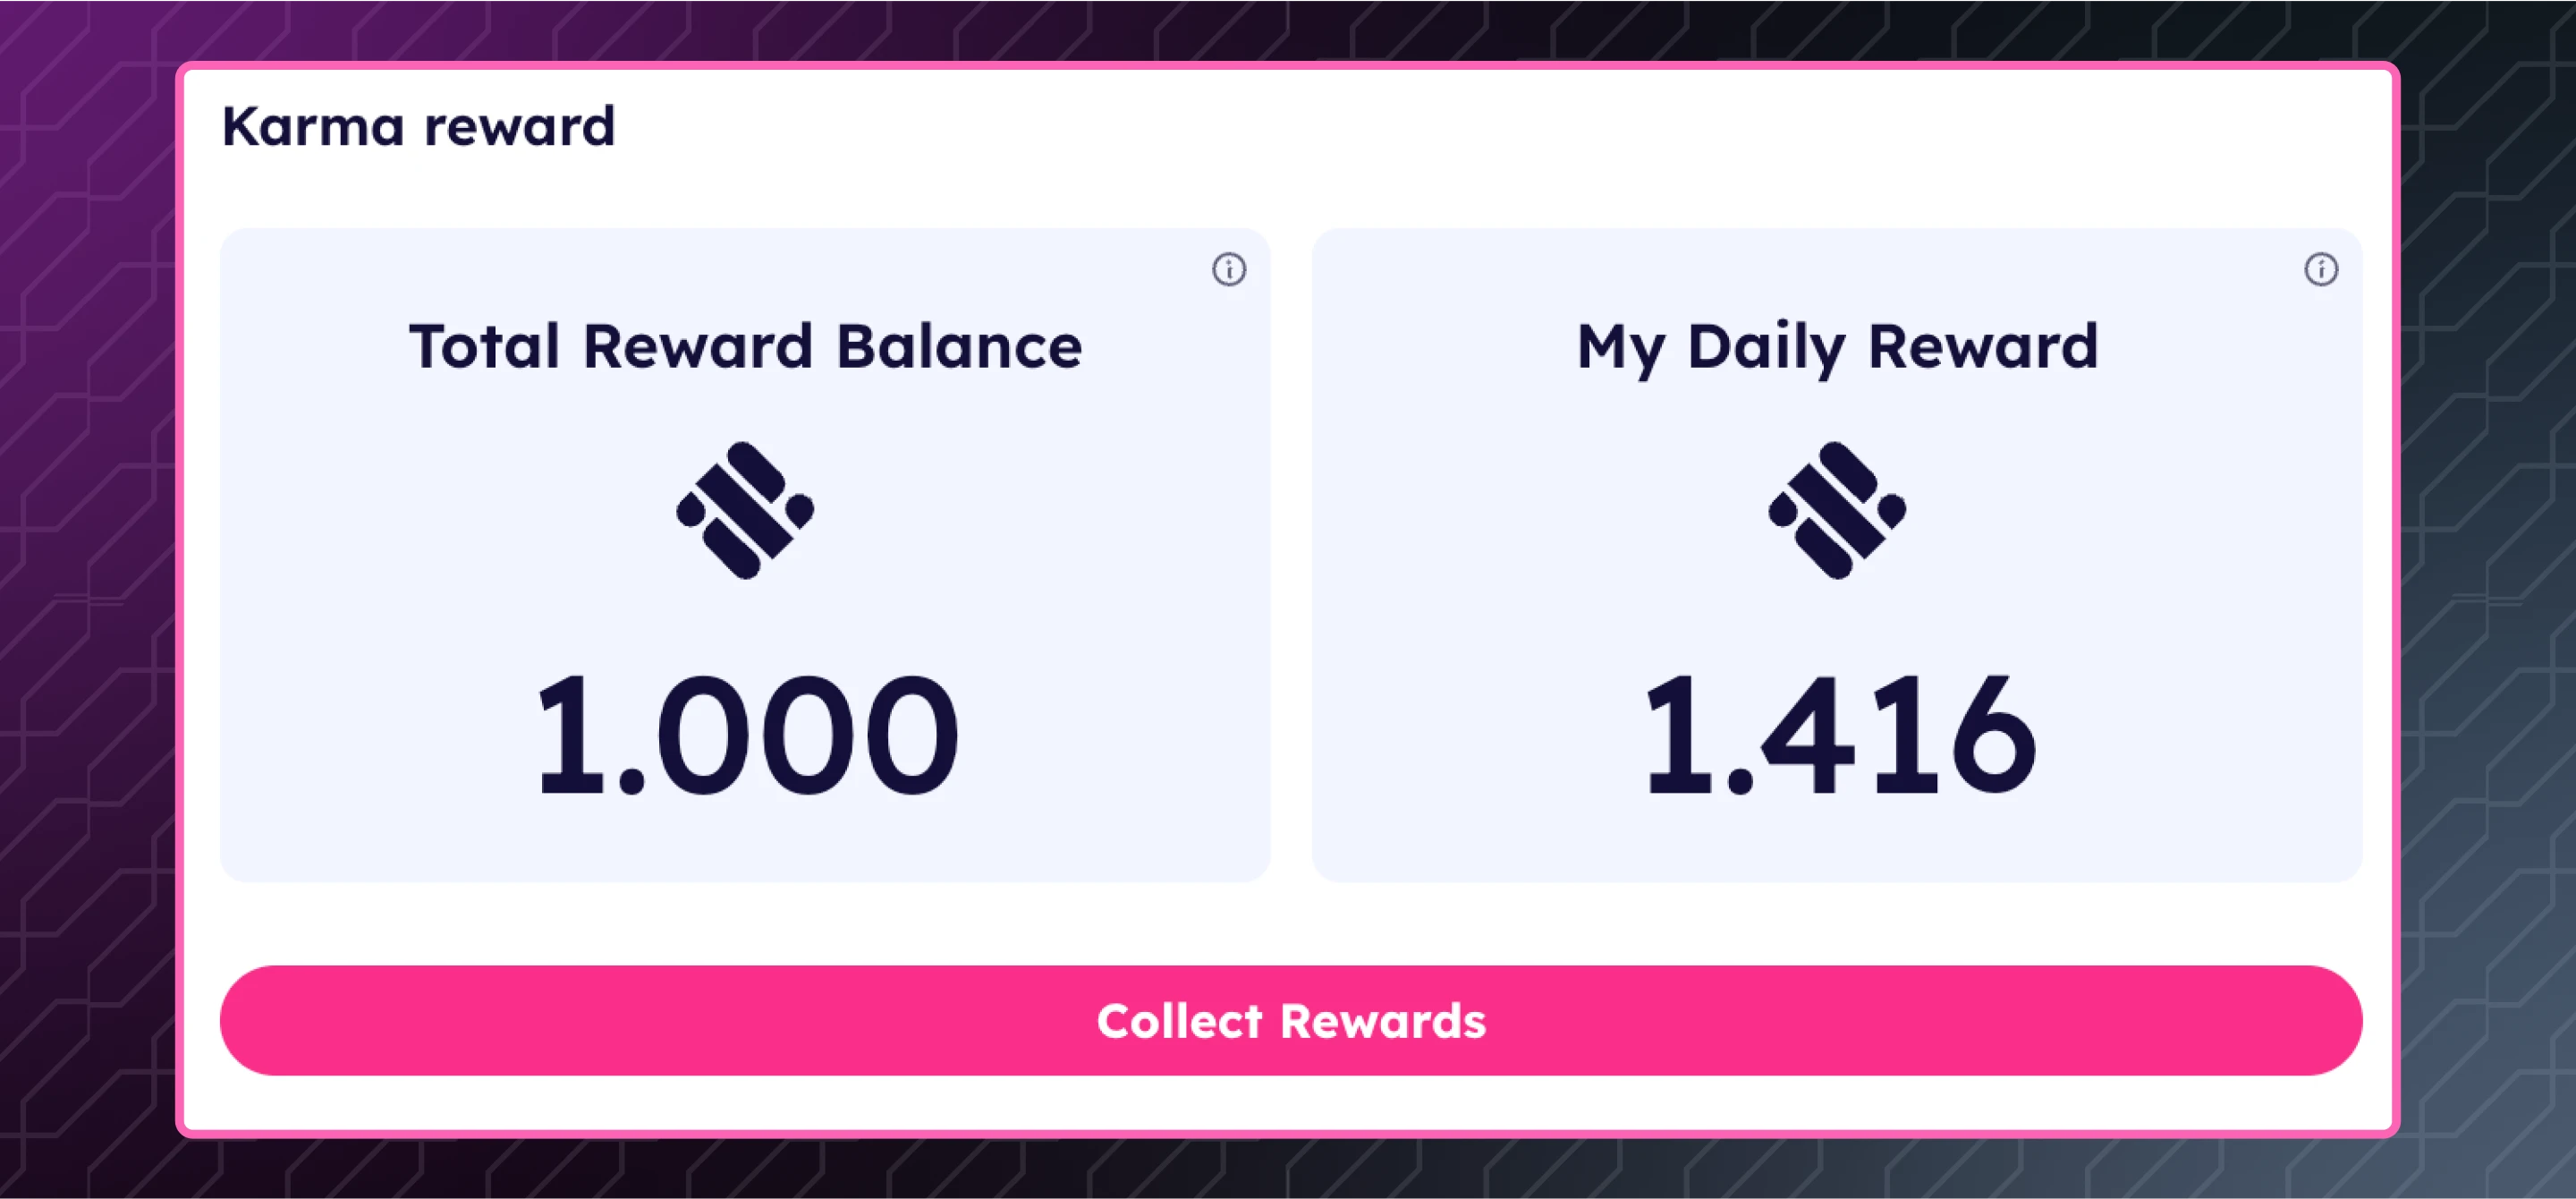
Click on the “Karma & Rewards” option.
Step 2: Collect Your Rewards
Click on the “Collect Rewards” button.
Read the information in the pop-up and click on the “Confirm” button.

Sign the approval and confirm the Gas Fees.
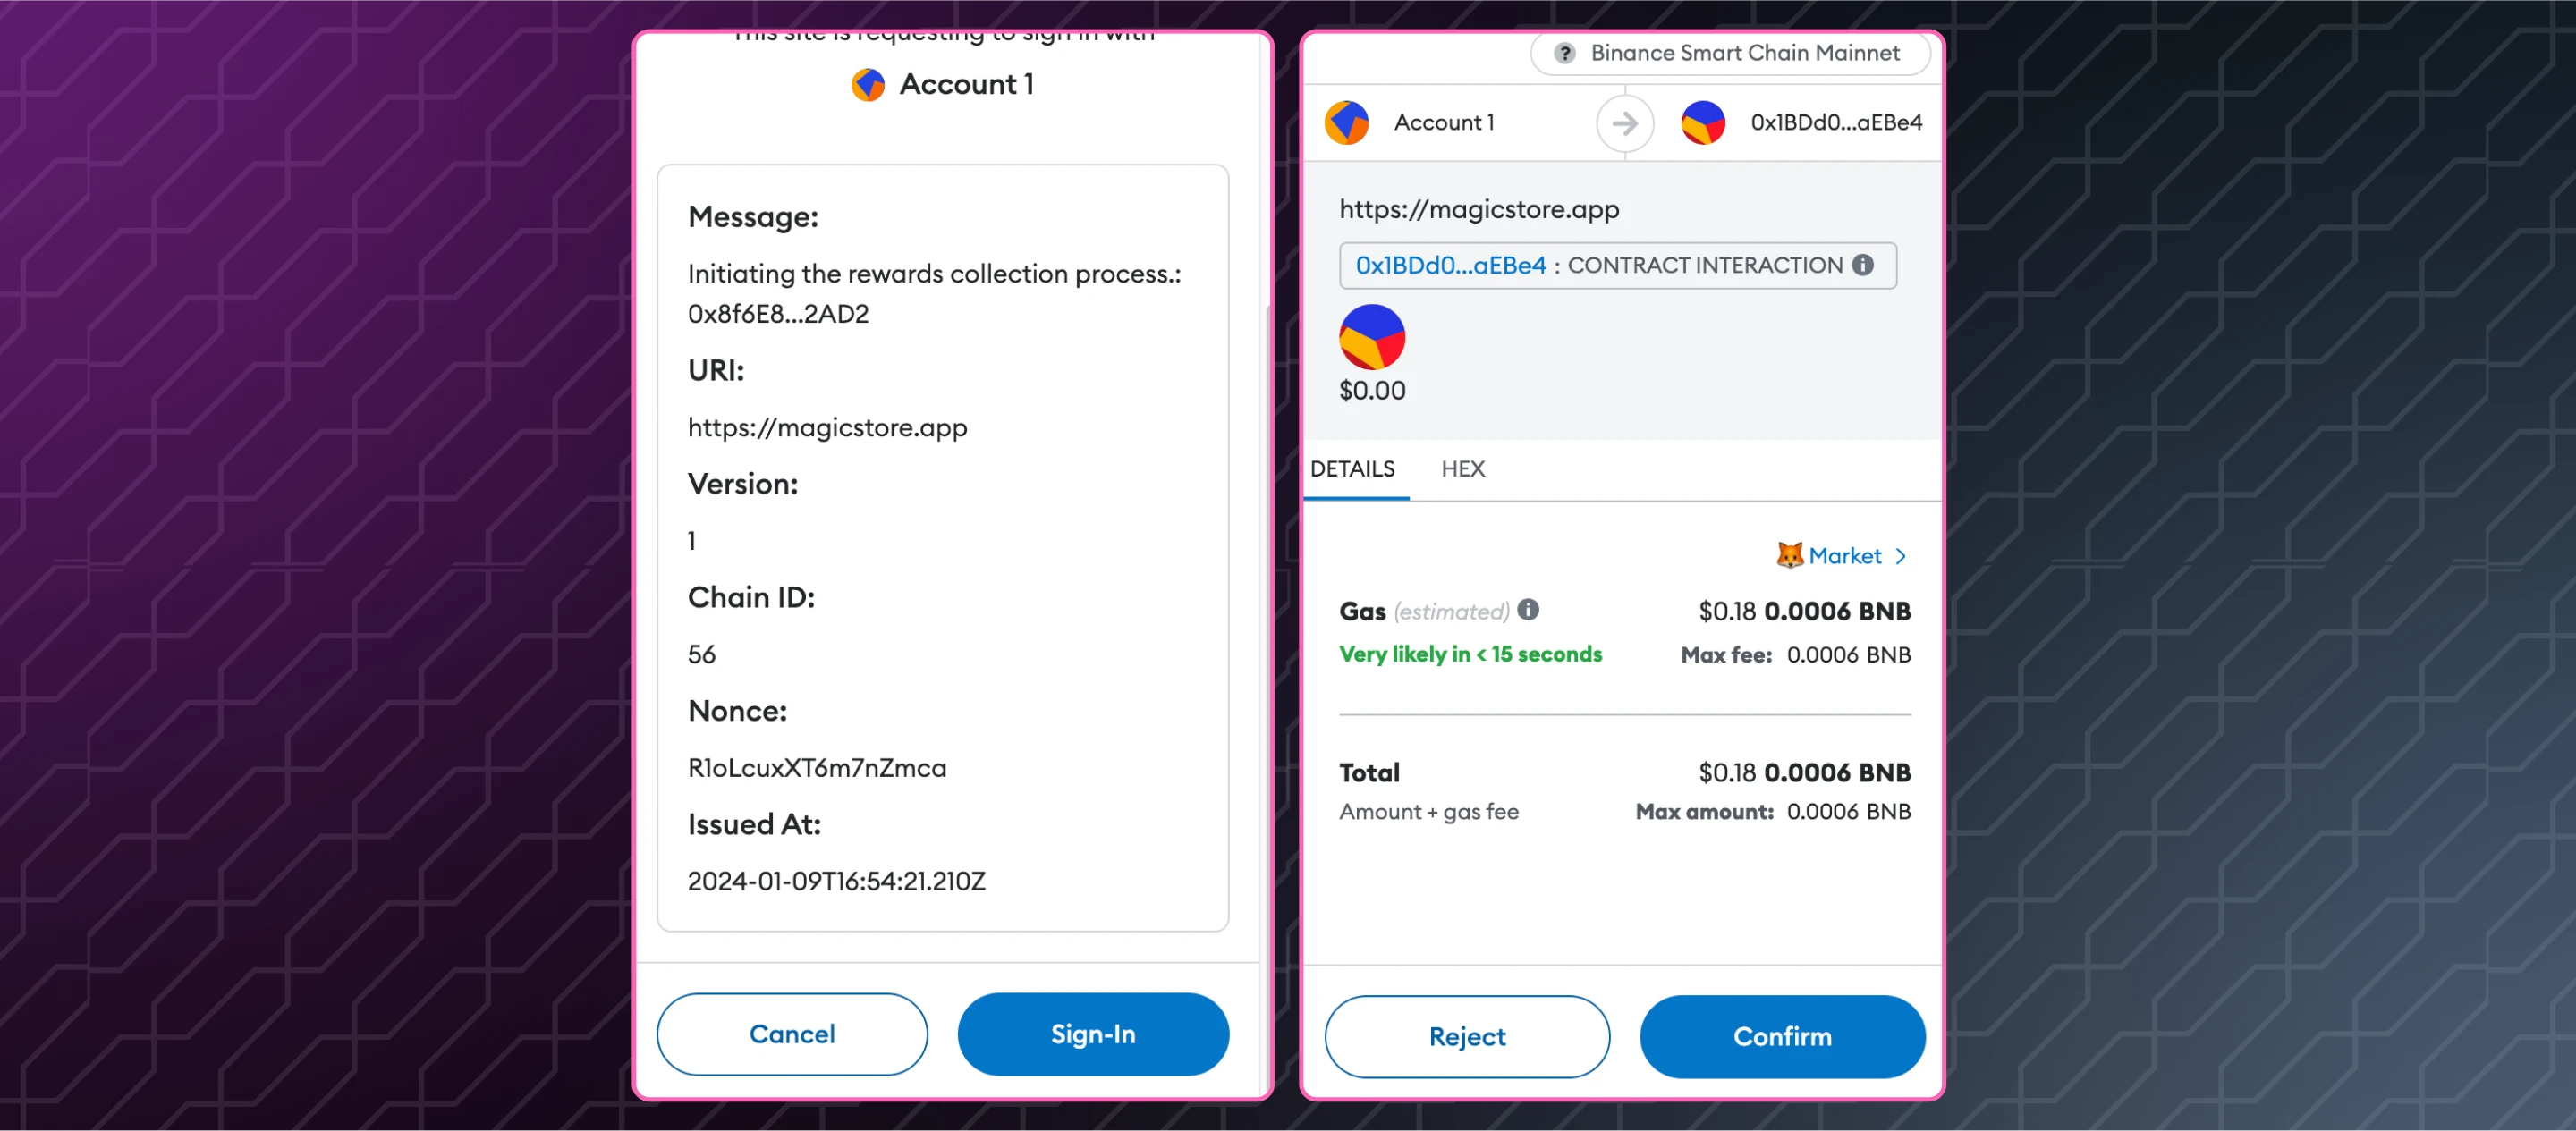
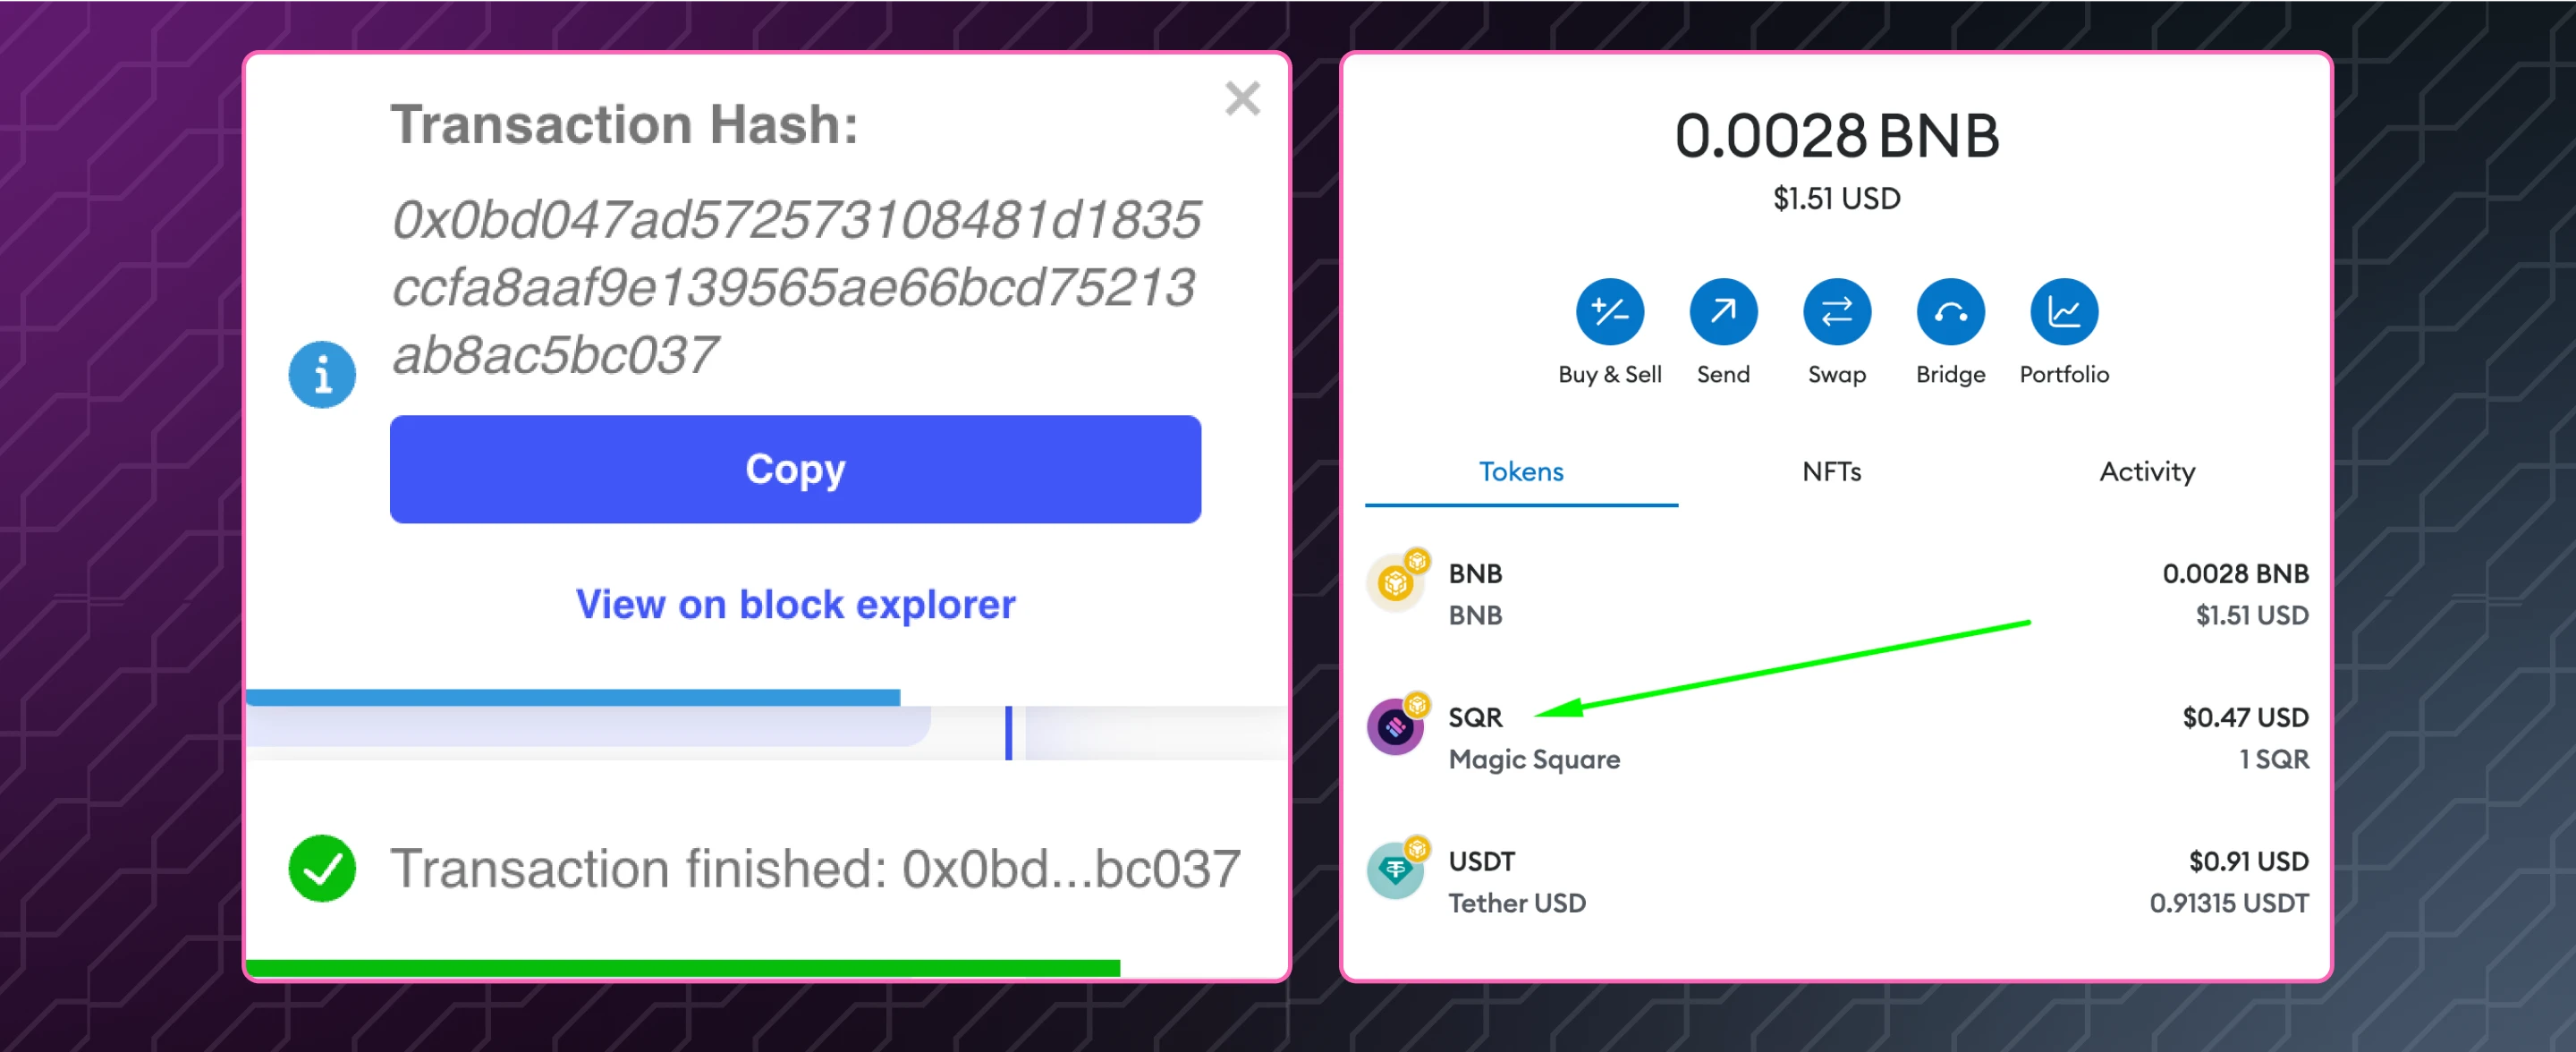
Once the transaction completes, a pop-up indicating a successful transaction will appear. You can view the transaction on the block explorer.
You should then see your SQR reward in your wallet.